J. Perkins点评道:
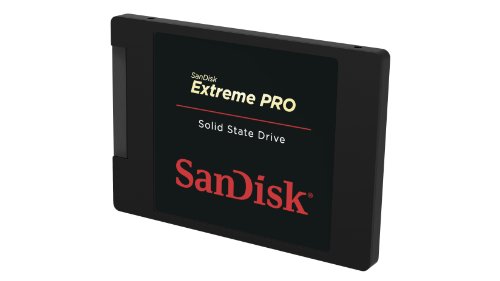
原文: This was a cinch to install, but it still took me awhile to figure out what I was doing. The other reviews were very helpful, along with the SanDisk support website. I wanted to install this SSD on my Dell Inspiron i15R-1632sLV 15.6-Inch Laptop, which has been pretty good for the most part. Howev
er, it takes forever to start upthere seems to be a lot of Dell bloatware that it could do without.
So here is the process for installing this on a laptop:
1. Obtain a USB to SATA adapter cable.
I did not realize I needed this to hook up the SSD for cloning until after step 2 so I had to wait a few days after I ordered it.
2. Clean up and back up your hard drive.
The SanDisk SSD 480 GB is smaller than the hard drive on my Dell (750 GB), and I had a lot of photos, videos, and music taking up a lot of room. So first I cleaned up my hard drive and got rid of junk I did not want anymore. Then I backed up my personal files, including all of those aforementioned photos and videos, before deleting them from my hard drive.
3. Clone your existing hard drive.
After I received the cable, I downloaded Macrium Reflect cloning software from download.com. I considered buying the software recommended by Sandisk, but other reviewers recommended Macrium Reflect. It also got good reviews from CNET. Macrium was easy to use, but it took a while to clone my hard drive onto the SSD. Plug the SSD into your USB port using the adapter. My computer at first did not install the driver for the SSD until I unplugged another USB device that was pulling power from my computer. Of course, keep your laptop power supply connected during this processdon’t try to do it on battery power. After opening the Reflect program, I decided to watch one of their Help videos on cloning a drive, which was very helpful. I followed those directions and proceeded to clone the drive. It took about two hours to complete the clone (about 125 GB of data).
4. Install the SSD.
Then all you have to do is install the SSD, which is also very easy if all the screws cooperate. Turn off and unplug your laptop. Turn it over. Remove the battery. Unscrew and remove the back panel covering the hard drive (on the Dell, I just took a guess and removed the central panel and there was the hard drive, the same size as the SSD). Remove the screws holding the hard drive bracket in the laptop, gently pull the hard drive out of the connector using the plastic pull tab on the bracket, and remove the hard drive. Then remove the screws holding the hard drive to the bracket (one of mine was difficult to remove and almost got completely stripped before coming loose. Attach the SSD to the bracket in the same way using the same screws. Set the SSD in the laptop where the hard drive was and slide the connector in place. Then screw the bracket in place using the same screws. Reattach the back panel, reinstall the battery, plug the computer back up, and start it up. The computer then required a restart to finish the installation, and that was it. The whole install process took less than 20 minutes (after the cloning part).
The difference in performance was immediately noticeable. Where before it took five minutes to start up, it now starts in less than 30 seconds. All tasks, from loading web pages to starting programs, are quite zippier than before.
I wish I had the bigger size (960 GB), but this should encourage me to keep my mess of photos and videos in better order. My only complaint is that I did not initially realize that I needed the USB to Sata adapter until I sat down to install this and then had to wait a few days while I ordered it. But that is really my own fault for not doing the research beforehand. Anyway, this is a great upgrade to my computer. Highly recommended.
显示更多>>
译文:
这个硬盘很容易安装,但我花了一段时间,弄清楚我在做什么。在闪迪支持的网站上的评论都是很有帮助的。我想在我的戴尔Inspiron i15r1632slv 156英寸笔记本电脑安装这个SSD,然而一直没成功。
这是在笔记本电脑上安装的过程:
1.获取USB到SATA适配器电线。
我没有意识到我需要把SSD连接起来直到完成了第2步骤之后,所以我不得不等了几天。
2.清理并备份硬盘驱动器。
闪迪SSD 480 GB比我的戴尔硬盘(750 GB)小,又因为我有很多的照片,视频和音乐占了很多空间,所以首先我清理了硬盘,扔掉了我不需要的垃圾,然后我备份我的个人文件,包括所有前面提到的照片和视频,然后再从硬盘上删除它们。
3.克隆你现有的硬盘驱动器。
在我收到硬盘后,我从downloadcom克隆软件下载Macrium。根据其他人推荐Macrium反映,我选择买闪迪推荐的软件,在CNET它也得到了很好的评价。Macrium很容易使用,但费了一段时间来克隆我的硬盘到SSD,使用适配器将SSD插入USB端口。我的电脑没有安装驱动的SSD直到我拔出USB设备,于是从我的电脑拉动力。当然,这需要保持你的笔记本电充足,这processdon不在连接尝试使用电池电源。打开反射程序后,我决定观看他们的一个关于帮助克隆驱动器的视频,这非常有用。我顺着那个方向,开始克隆驱力。克隆完成大约花了两个小时(大约125 GB的数据)。
4.安装的SSD。
如果所有配合都很容易,然后你所要做的就是安装SSD。关掉并拔掉你的笔记本电脑。把它翻过来。拆卸电池。旋开和拆卸覆盖在硬盘驱动器上的后面板(在戴尔上,我只是猜了一下,去掉了中央面板,还有硬盘,与SSD大小相同)。拆下手提电脑上的硬盘托架,用支架上的塑料拉环将硬盘从连接器中拔出,然后拆下硬盘驱动器。然后取出固定在支架上的螺丝(其中一个很难去除,在松开之前几乎完全被剥离了。用同一螺钉将SSD固定到支架上。在硬盘驱动器的笔记本电脑上设置SSD,并将连接器滑动到位。然后用相同的螺钉将支架固定到位。将后面板,重新安装电池,插入电脑备份,并启动它。计算机需要重新启动才能完成安装。整个安装过程只用了不到20分钟(克隆部分)。
差别立即显现出来。在之前开始需要五分钟,它现在开始不到30秒。所有的任务,从网页加载到启动程序,比以前快了很多。
我希望我有更大的尺寸(960 GB),但这应该鼓励我维持我的照片和视频的秩序。我唯一的不满是,我没有意识到我需要USB连 接到SATA适配器,直到我坐下来安装这个,然后不得不等待几天,订购它。但那确实是我自己没有事先做研究的错。不管怎样,这对我的电脑来说是一次大的升级。强烈推荐。


